Send h2o log to BigQuery

h2oのアクセスログをtd-agentを使ってGoogle BigQueryに送ってみる。幾つか手順が必要。
- bigqueryの設定
- スキーマ定義ファイルの作成
- td-agentの設定
bigqueryの設定
bigqueryへアクセスするためにapiを有効化し、アクセスキーを発行するのだが、この工程が長い…。(´・_・`)
慣れてないと混乱する。
gcpアカウントの作成
作る。
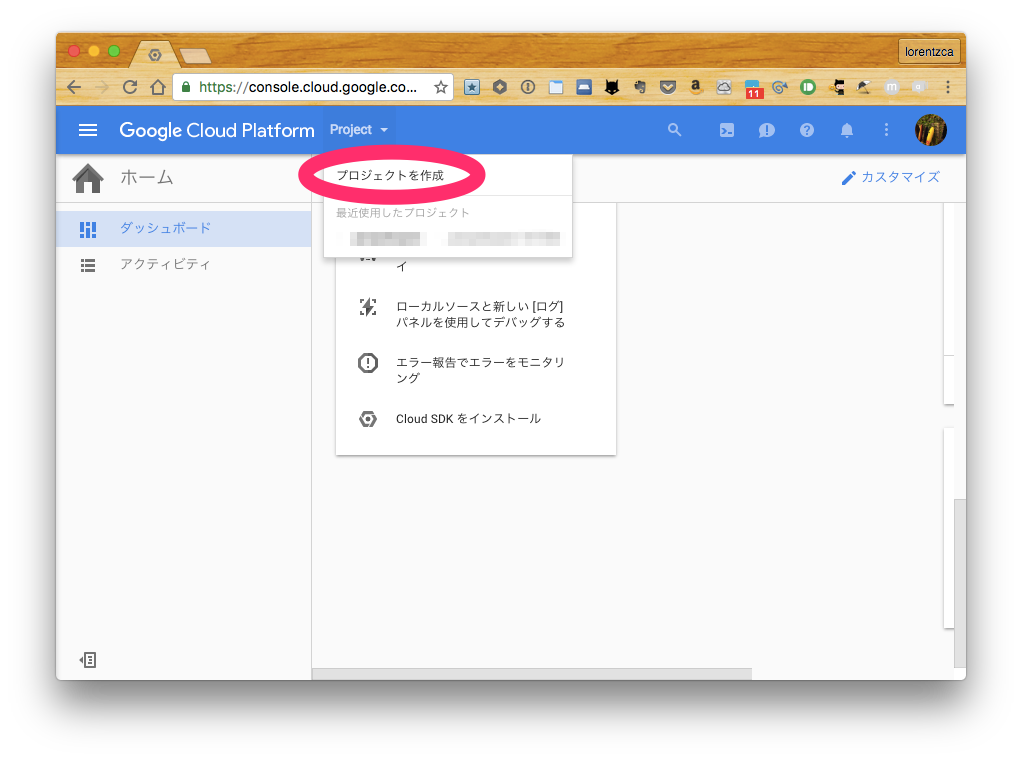
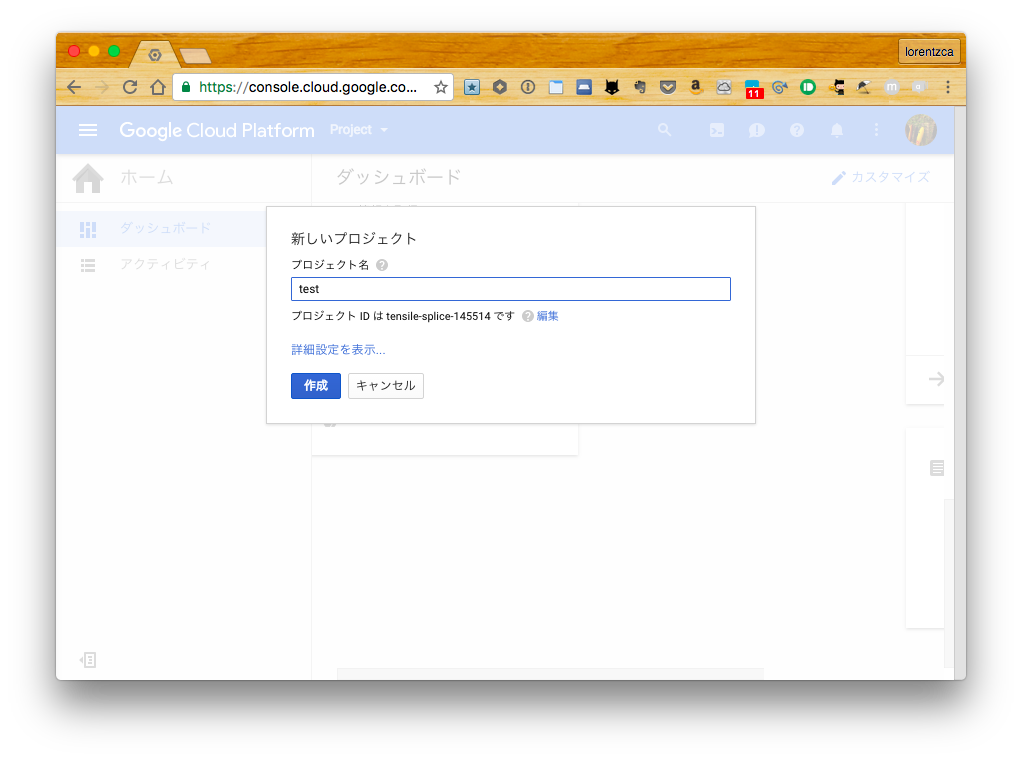
プロジェクトの作成
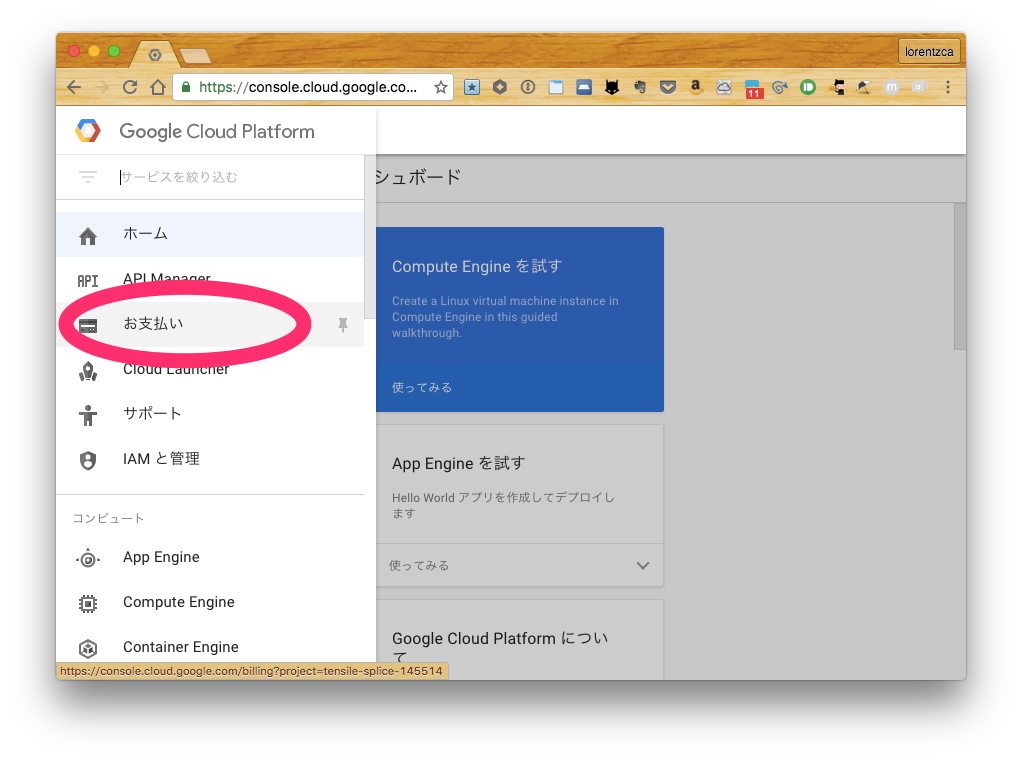
請求先アカウントの設定
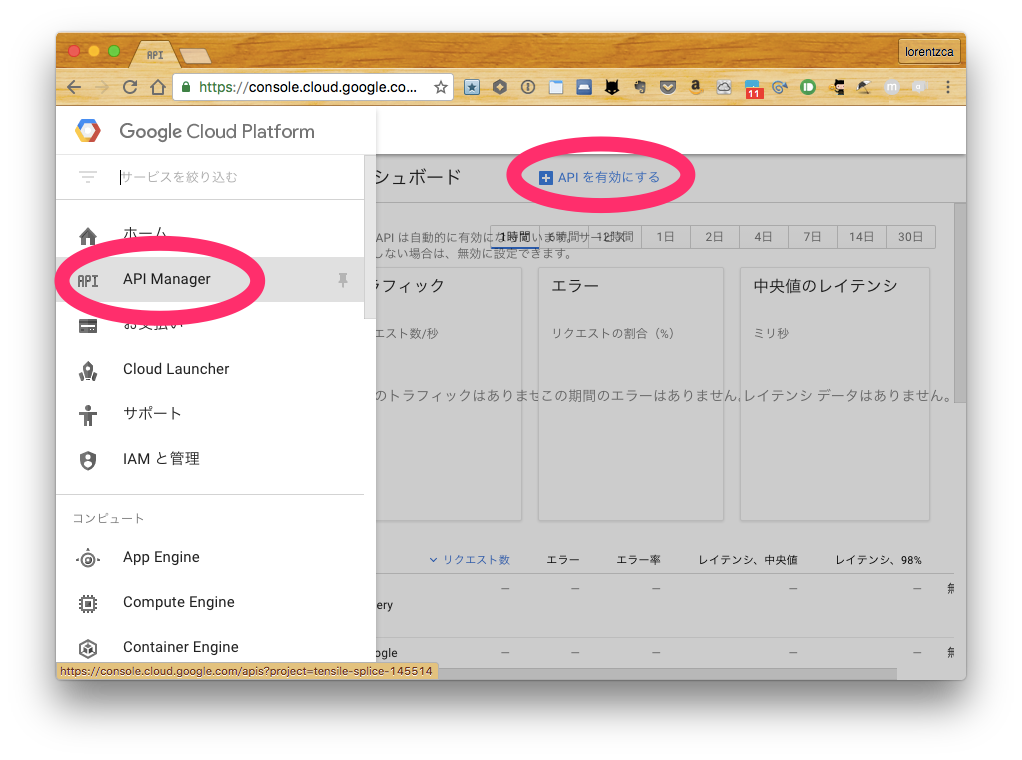
bigqueryのapiを有効化
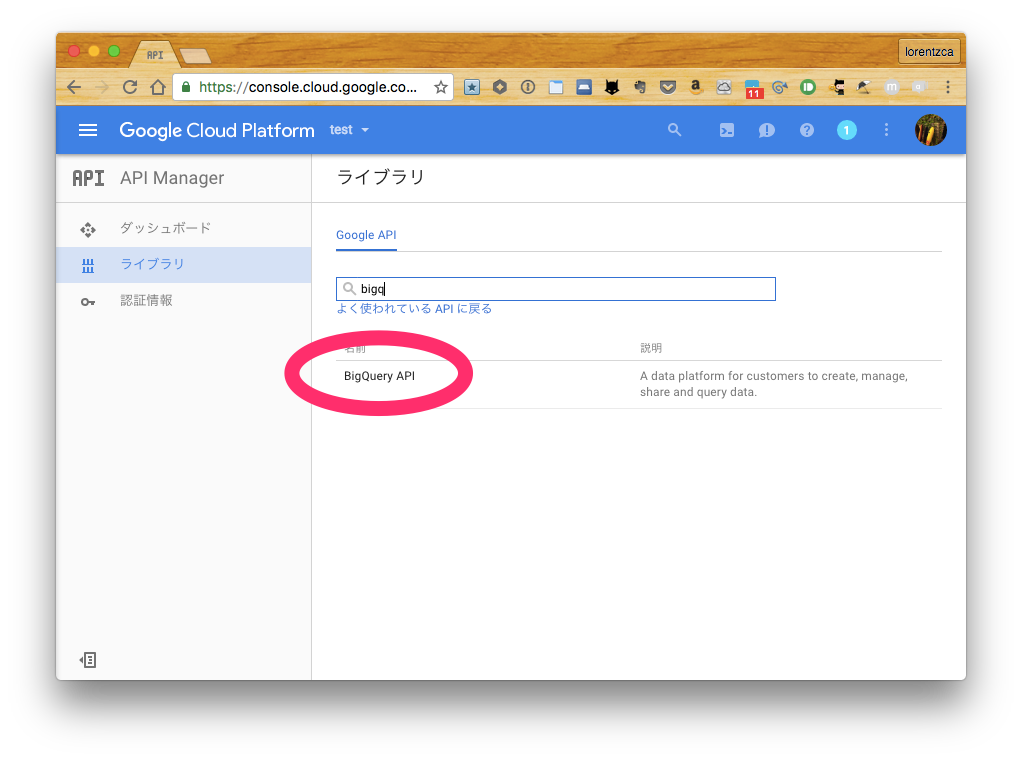
認証情報(とサービスアカウント)の作成
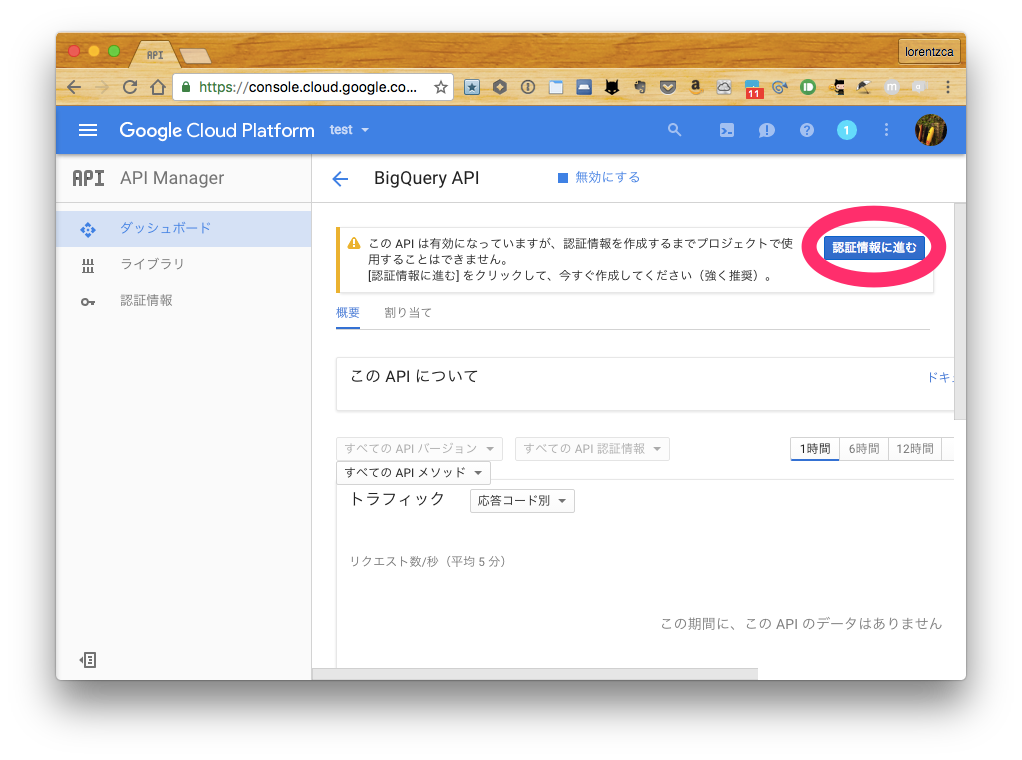
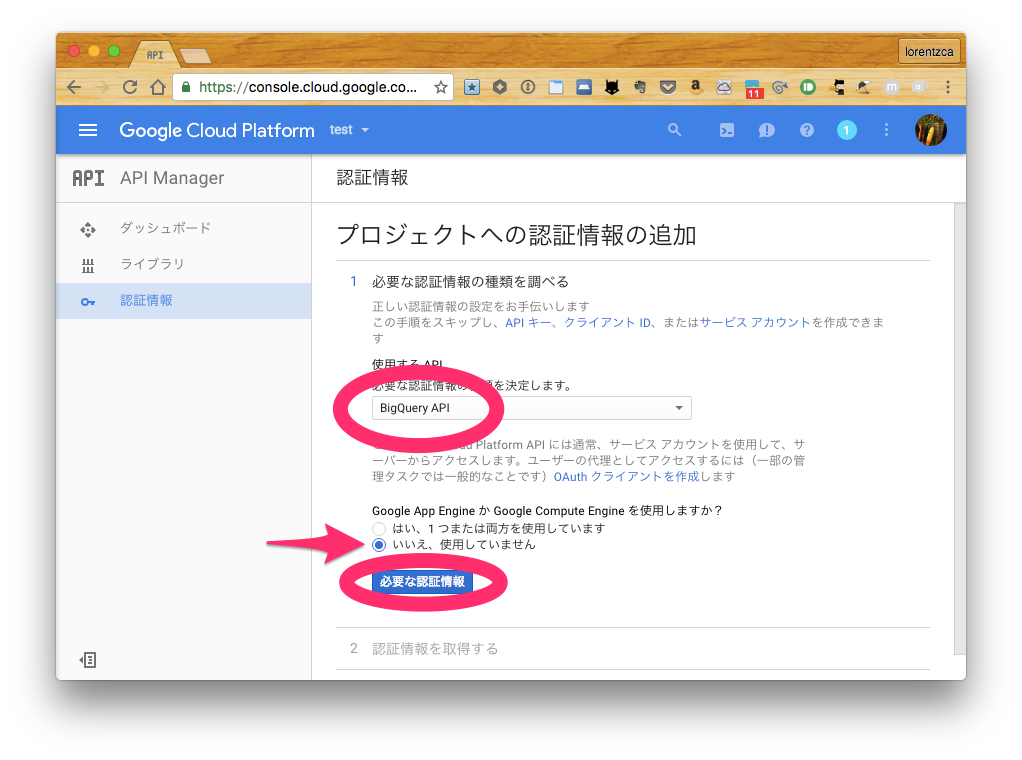
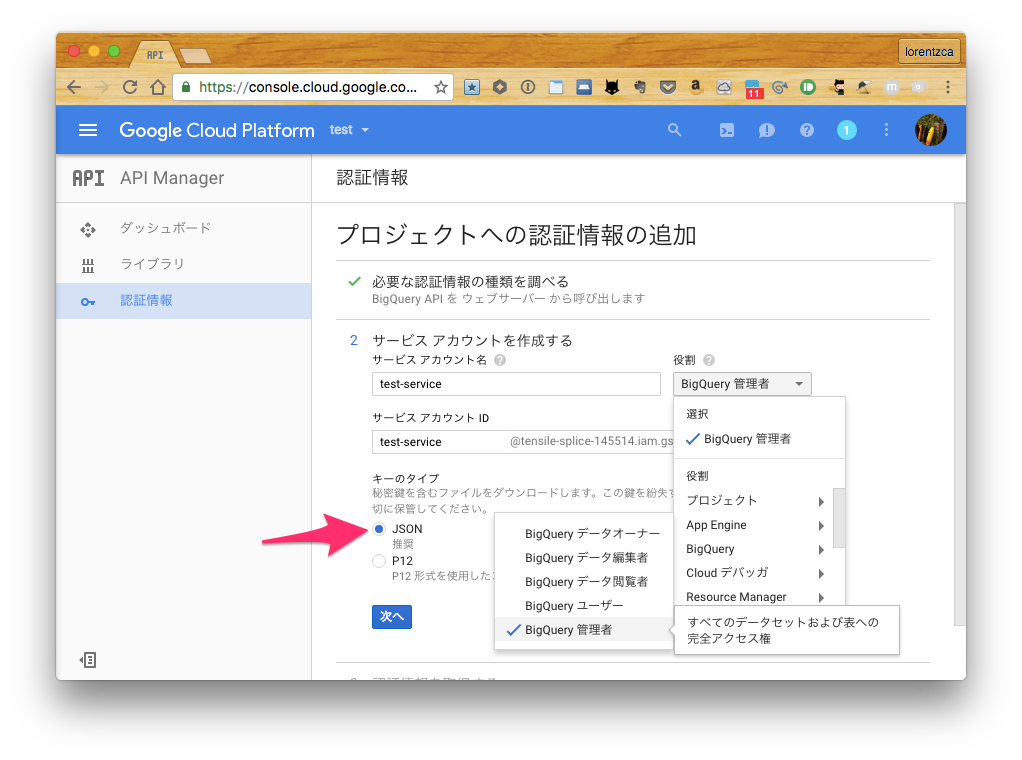
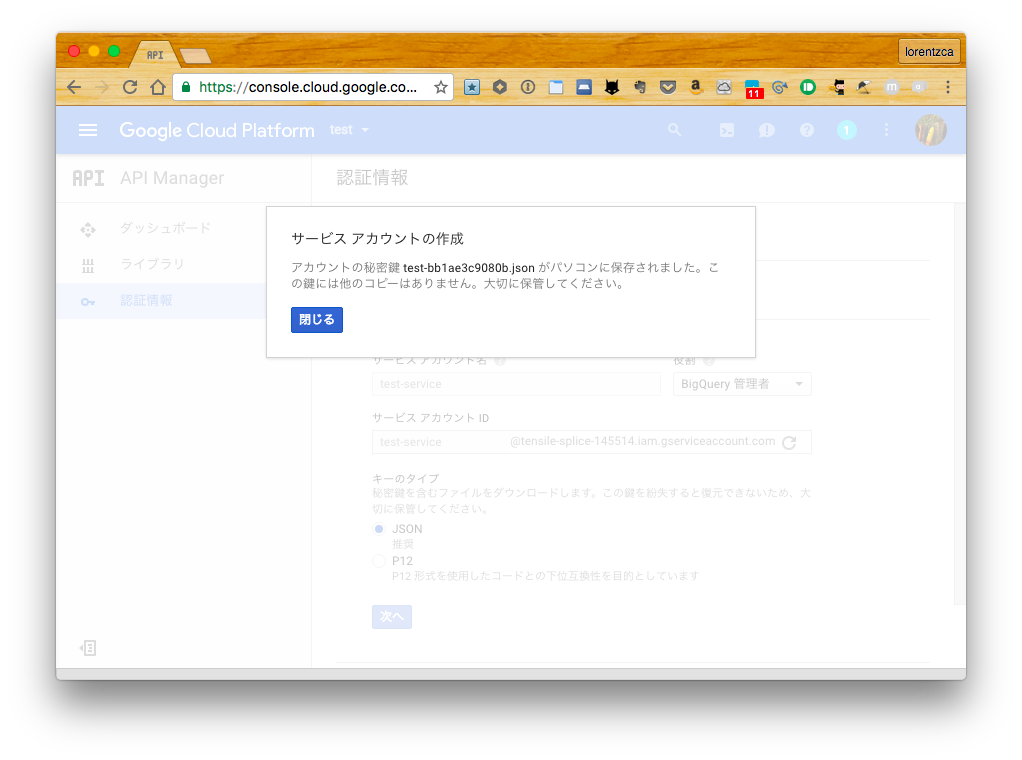
これでやっと以下のようなjson形式の鍵ファイルがダウンロードされる。td-agnetの設定で使う。
{
  "type": "......",
  "project_id": "......",
  "private_key_id": "......",
  "private_key": "......",
  "client_email": "......",
  "client_id": "......",
  "auth_uri": "......",
  "token_uri": "......",
  "auth_provider_x509_cert_url": "......",
  "client_x509_cert_url": "......"
}
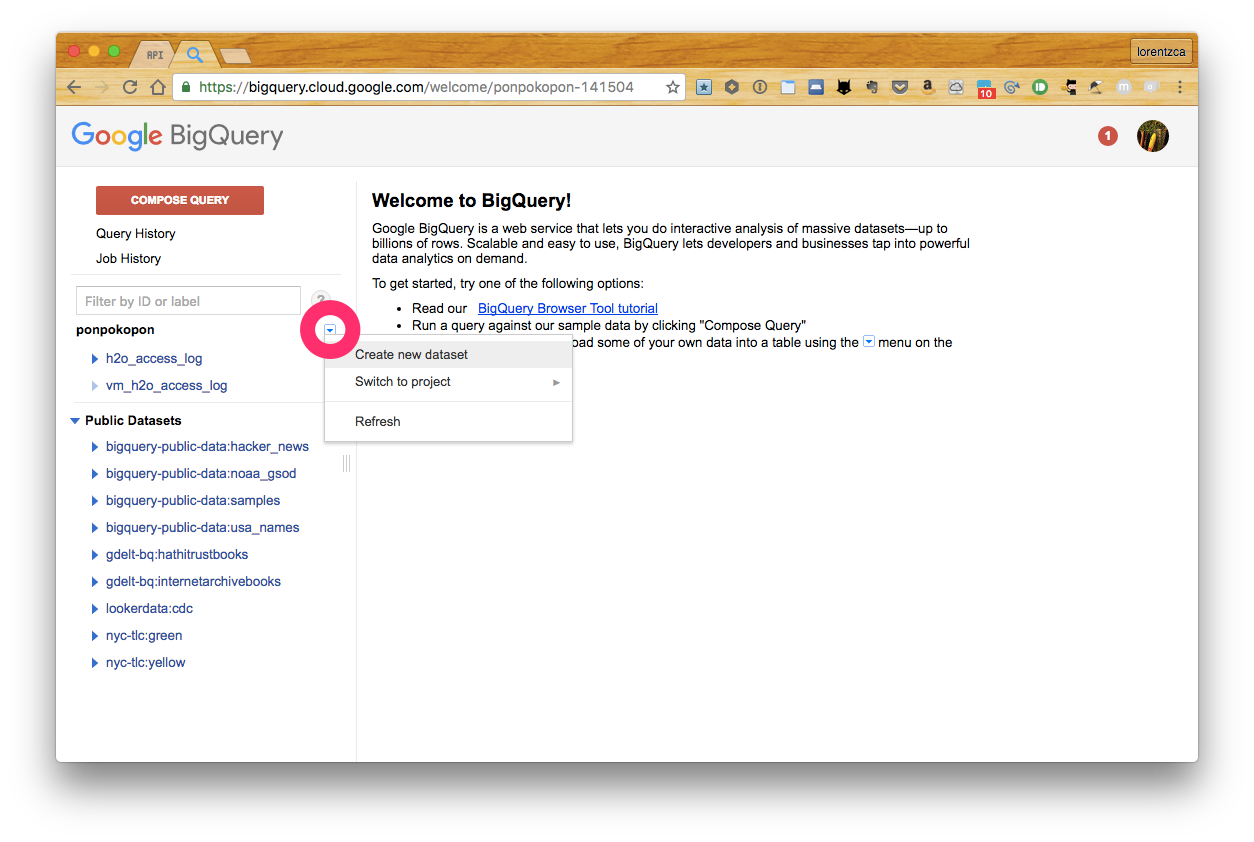
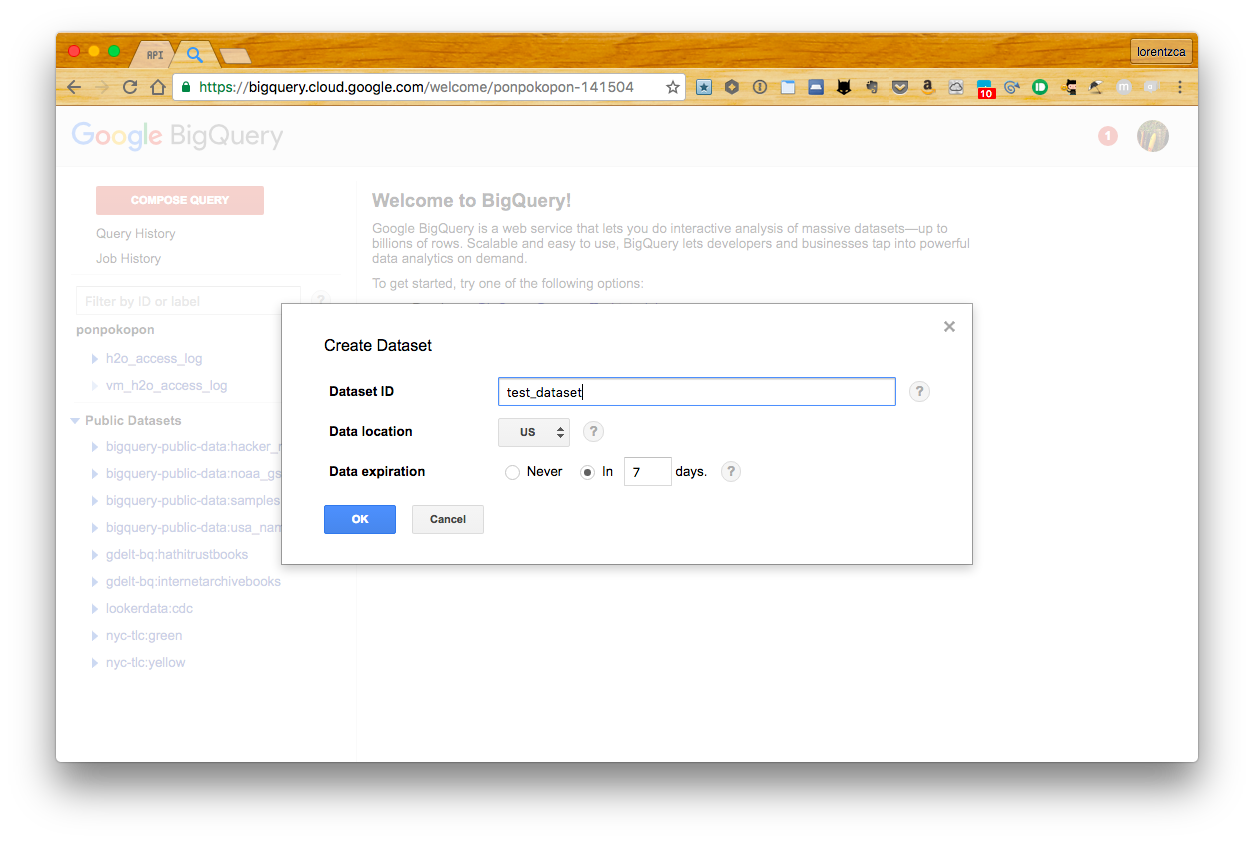
データセットの作成
ログの保存先となるデータセットを作成しておく。data expirationを7日にしてデータが無限に溜まり続けないようにしている。
スキーマ定義ファイルの作成
送信するデータはbigqueryのテーブル内にスキーマとして保存されるが、このスキーマの型やフィールド名を定義するファイルを準備する。送信されるデータはこのスキーマ定義ファイルの内容に従って保存される。
ちなみにh2oのログフォーマットは以下のように設定してある。
access-log:
    path: /var/log/h2o/access.log
    format: "%h %l %u %{%Y/%m/%d:%H:%M:%S}t \"%r\" %s %b"
漏れが無いように注意してスキーマファイルを作成。
[
  {
    "name": "remote_address",
    "type": "STRING"
  },
  {
    "name": "remote_logname",
    "type": "STRING"
  },
  {
    "name": "remote_user",
    "type": "STRING"
  },
  {
    "name": "request_time",
    "type": "STRING"
  },
  {
    "name": "request_line",
    "type": "STRING"
  },
  {
    "name": "status_code",
    "type": "STRING"
  },
  {
    "name": "size_of_the_response_body",
    "type": "STRING"
  }
]
td-agentの設定
さあ やっとtd-agentの設定じゃー!
td-agentのインストールは割愛。
fluent-plugin-bigqueryのインストール
bigqueryにログを送るためのプラグインをインストールする。
td-agent-gem install fluent-plugin-bigquery
systemのgemじゃなくてtd-agentにバンドルされて入ってきたgemを使う必要があるので注意(gemがインストールされる場所などが違う)。
$ gem environment gemdir
/home/lorentzca/.gem/ruby

$ td-agent-gem environment gemdir
/opt/td-agent/embedded/lib/ruby/gems/2.1.0/
td-agent.confの設定
sourceの設定はformatが肝!
超便利なシミュレータサイトがあるので、実際のログを使って試しながら作れる。
<source>
  @type tail
  format /(?<remote_address>[^ ]*) (?<remote_logname>[^ ]*) (?<remote_user>[^ ]*) (?<request_time>[^\]]*) (?<request_line>[^ ]* +\S* +\S*) (?<status_code>[^ ]*) (?<size_of_the_response_body>[^ ]*)/
  path /var/log/h2o/access.log
  tag h2o.access
  pos_file /var/log/td-agent/h2o.access.pos
</source>
matchの設定でbigqueryにログを送る設定を書く。ここで先程取得したbigqueryのアクセスキーを使う。アクセスキーの形式は、
{"private_key": "......", "client_email": "......"}
なので注意!
You can also provide json_key as embedded JSON string like this. You need to only include private_key and client_email key from JSON key file.
GitHub - kaizenplatform/fluent-plugin-bigquery
jqで指定された形式に変換すればそのまま使えて楽ちん。
$ cat test-bb1ae3c9080b.json | jq -c ' . | {private_key: .private_key, client_email: .client_email}'
{"private_key":"......","client_email":"......"}
テーブル名は日付にしていて、auto_create_table trueすることで自動的に生成されるようにしている。あとは先程作成したスキーマを指定しているくらい。
<match h2o.**>
  @type bigquery

  method insert

  auth_method json_key
  json_key {"private_key": "......", "client_email": "......"}

  project プロジェクトID
  dataset データセット名
  table %Y_%m_%d

  auto_create_table true
  schema_path /etc/td-agent/schema-bigquery-h2o.json
</match>
動作確認
bqコマンドでデータが保管されているか確認すると管理画面行かなくていいので楽。まずgcloudコマンドをインストールする。
認証する。
gcloud auth login
gcloud config set project プロジェクトID
データセット/テーブル一覧。
bq ls
bq ls データセット名
クエリ実行。
bq query 'SELECT * FROM [プロジェクトID:データセット名.テーブル名] LIMIT 10'
Ansible
td-agent周りのインストールや設定はプレイブックで管理している。
roles/common/handlers/main.yml
- name: restart td-agent
  service: name=td-agent state=restarted
roles/common/tasks/main.yml
- name: td-agent repo is already installed
  stat: path=/etc/yum.repos.d/td.repo
  register: td_repo
  tags: td-agent

- name: td-agent repo setup script is downloaded
  get_url: url=https://toolbelt.treasuredata.com/sh/install-redhat-td-agent2.sh dest=/tmp/install-redhat-td-agent2.sh
  when: not td_repo.stat.exists
  tags: td-agent

- name: td-agent repo is installed
  become: yes
  shell: bash /tmp/install-redhat-td-agent2.sh
  when: not td_repo.stat.exists
  tags: td-agent

- name: td-agent is installed
  yum: pkg=td-agent state=installed
  tags: td-agent

- name: schema-bigquery-h2o.json is added
  copy: src=schema-bigquery-h2o.json dest=/etc/td-agent/schema-bigquery-h2o.json owner=root group=root mode=0644
  tags: td-agent

- name: fluent-plugin-bigquery is installed
  gem: name=fluent-plugin-bigquery executable=/usr/sbin/td-agent-gem user_install=no
  notify:
    - restart td-agent
  tags: td-agent

- name: td-agent.conf is configured
  template: src=td-agent.conf dest=/etc/td-agent/td-agent.conf owner=root group=root mode=0644
  notify:
    - restart td-agent
  tags: td-agent

- name: td-agent is runnning and enabled
  service: name=td-agent state=running enabled=yes
  tags: td-agent
感想
- 慣れるとどーってこと無いけど手順が多くて初めてやるときはけっこう大変
- これでログを可視化したりいじくる基盤ができたので試せる領域が増やせた感!